Installing on AWS Marketplace
Riak TS can be installed on AWS virtual machines (VMs) using a binary package available here. This page will walk you through the process of setting up your AWS environment and installing Riak TS on it.
Launch Riak VMs via the AWS Marketplace
Get started by launching a Riak TS virtual machine via the AWS Marketplace. (You will need an Amazon Web Services account.)
Navigate to https://aws.amazon.com/marketplace/ and sign in with your Amazon Web Services account.
Locate Riak TS in the Databases & Caching category or search for Riak TS from any page.
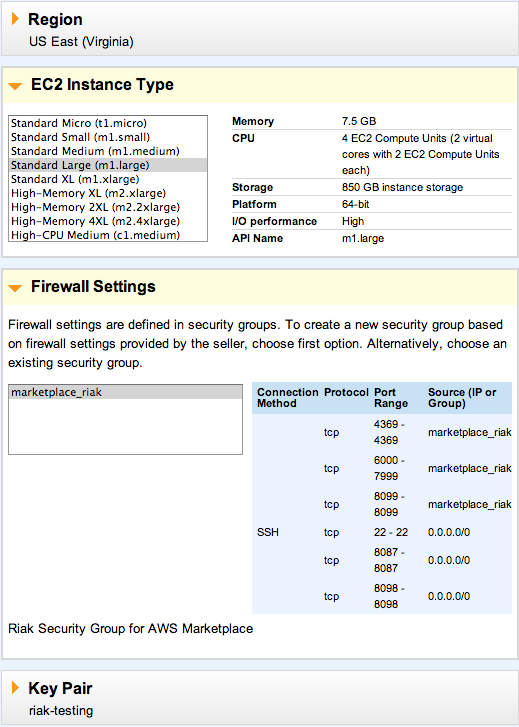
Set your desired AWS region, EC2 instance type, firewall settings, and key pair.

Then click the Accept Terms and Launch with 1-Click button.
Security Group Settings
Once the virtual machine is created, you should verify that your selected EC2 security group is properly configured for Riak TS.
In the AWS EC2 Management Console, click Security Groups, then click the name of the security group for your Riak TS VM.
Click on the Inbound tab in the lower pane. Your security group should include the following open ports:
- 22 (SSH)
- 8087 (Riak Protocol Buffers Interface)
- 8098 (Riak HTTP Interface)
You will need to add additional rules within this security group to allow your Riak TS instances to communicate. For each port range below, create a new Custom TCP rule with the source set to the current security group ID (found on the Details tab).
- Port range: 4369
- Port range: 6000-7999
- Port range: 8099
When complete, your security group should contain all of the rules listed below. If you are missing any rules, add them in the lower panel and then click the Apply Rule Changes button.

We also recommend that you read more about Security and Firewalls.
Create a Riak Cluster on AWS
You will need need to launch at least 3 instances to form a Riak cluster. When the instances have been provisioned and the security group is configured, you can connect to them using SSH or PuTTY as the ec2-user.
You can find more information on connecting to an instance on the official Amazon EC2 instance guide.
Note: The following clustering setup will not be resilient to instance restarts unless deployed in Amazon VPC.
On the first node, obtain the internal IP address:
curl http://169.254.169.254/latest/meta-data/local-ipv4For all other nodes, use the internal IP address of the first node:
sudo riak-admin cluster join riak@<ip.of.first.node>After all of the nodes are joined, execute the following:
sudo riak-admin cluster planIf this looks good:
sudo riak-admin cluster commitTo check the status of clustering use:
sudo riak-admin member_status
You now have a Riak cluster running on AWS.
Configure riak shell
In order to function, riak shell must know about each node in the cluster.
On each node, obtain the internal IP addresses:
curl http://169.254.169.254/latest/meta-data/local-ipv4On each node in the cluster, edit
/etc/riak/riak_shell.config, adding the IPs of each node. You should end up with a config that is similar to:%%% -*- erlang -*- [ {riak_shell, [ {logging, off}, {cookie, riak}, {show_connection_status, false}, {nodes, [ riak@10.13.37.221, riak@10.22.19.97, riak@10.2.54.31 ]} ]} ].Run
riak-shelland ping the nodes to test the configuration:sudo riak-shellYou should see a riak shell prompt:
[ec2-user ~]$ sudo riak-shell
Erlang R16B02_basho10 (erts-5.10.3) [source] [64-bit] [smp:2:2] [async-threads:10] [hipe] [kernel-poll:false] [frame-pointer]

version "riak_shell 0.9/sql 1.3", use 'quit;' or 'q;' to exit or 'help;' for helpConnected...
riak-shell(1)>
Run a
pingto test the configuration:riak-shell(1)>ping; 'riak@10.13.37.221': (connected) 'riak@10.22.19.97': (connected) 'riak@10.2.54.31': (connected) riak-shell(2)>
riak shell is now configured and ready for use.
